
 |
INTRODUCTION: What happens if you start to restore an old AM battery-operated tube table radio... and put it back together all wrong? The answer - BAMTRAT! (Battery AM Tube Radio Authentic Theremin). While such a project might offend the sensibilities of collectors, I decided to go ahead with it because this poor old radio had been sitting in my "to do" corner for several years, and I could never quite get the motivation to restore it. After all, the reward for all that work would have been just another AM radio. Instead, I decided to re-use all the major components to create a tube theremin with as authentic a sound as possible. A novel "differential tuning" approach makes for ease of tuning using the original tuning dial. The close-coupled antenna coil, used as the variable pitch oscillator, duplicates Lev Termen's trick of using hard coupling to provide that unique saw-like classic theremin sound. Scroll down for more info and pictures, or jump to: Full Schematics Technical details Sound Samples |

|
THE "BEFORE" PICTURE
Here's how it started out, as a pathetic little dumpster refugee. By the time I got around to taking this pic, I'd already glued the case back together and removed the peeling varnish. I also went through and documented the schematic, in case the idea didn't work out and I decided to turn it back into a radio. |
|
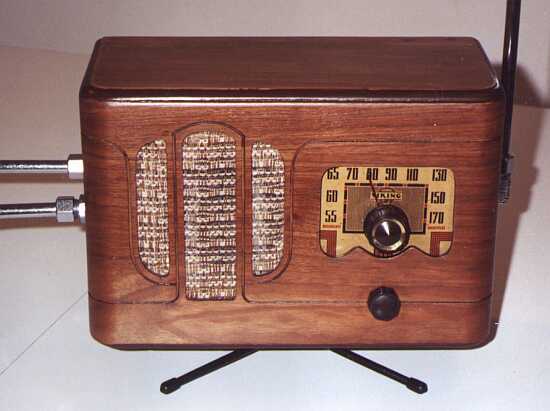
THE "AFTER" PICTURE
And here it is, all sanded and re-varnished and prettied up, sporting its lovely Official Moog™ Etherwave® antennae. The tuning dial is the pitch adjustment control, and the volume knob is -- as you might expect -- the master volume adjustment. I also finally found a use for that shnifty little microphone stand I had kicking around. |
|
|
From the back, it looks like it just rolled off the Viking assembly line (except for those strange electrodes mounted on the sides, and the power cord coming out of the chassis). Should be good for at least another sixty years. ;-) |
|
|
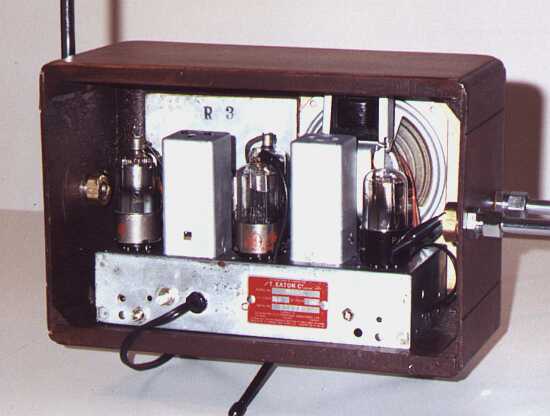
CHASSIS TOP
From the top, the chassis is virtually indistinguishable from the original radio, unless you look really closely you'd never guess that it's now a theremin. One clue is the added shafts on the back, which are the Volume Oscillator "range" and "fine tuning" controls. Another clue is the AC power cord, which of course didn't exist on the original battery radio. The IF can on the right now houses the two small "wall-wart" transformers constituting part of the Battery Eliminator power supply circuit. The IF can on the left is basically original (with an added winding), used for the volume oscillator. |
|
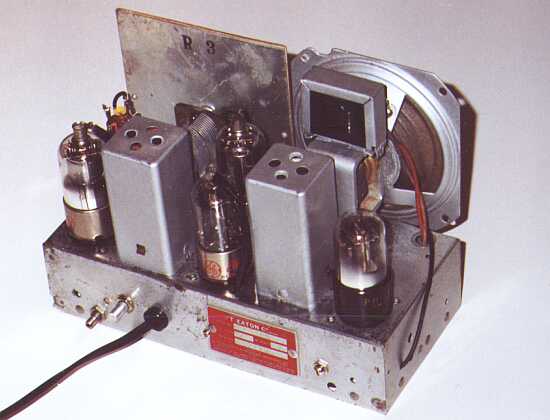
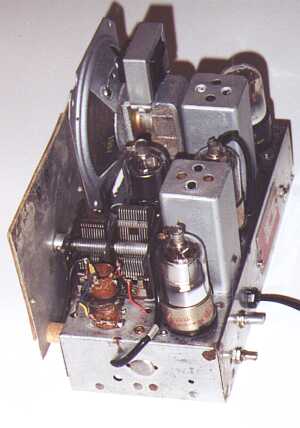 |
Another view of the chassis topside, showing the original antenna coil used as -- you guessed it -- one of the pitch oscillator coils. The original oscillator and antenna coils are wired to the opposite capacitor sections, however, causing the two oscillator frequencies to track at different rates; this allows easy pitch tuning using a single control. |
|
UNDER THE HOOD
Below the chassis is another story. In the upper-left you can see the perf-board contruction of the Battery Eliminator power supply, fed from the two transformers crammed into one of the original IF transformer cans. |
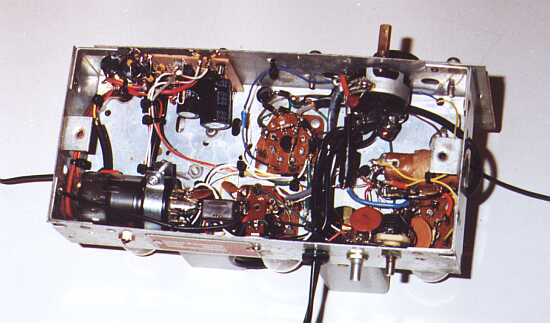 |
| At the right is the original oscillator coil, teamed up with the "antenna" section of the tuning cap to form the fixed pitch oscillator. |
| At the lower-left you see the added volume oscillator tube, a "loktal" Type 1LG5 pentode, connected using gold-plated DB pins instead of the usual socket. It is secured using a clamp ring around the base, in turn bolted to the chassis. |
|
MORE ABOUT "BAMTRAT"
Full Schematics Technical details Sound Samples |
Back to my Theremin Index page
Back to Fred's Vacuum Tube Projects
To my music home page
Email me